Landscape edging is not just about creating clean lines between different elements in a garden; it’s also a crucial skill for enhancing the overall look and functionality of outdoor spaces. For those looking to embark on a career in landscaping, mastering landscape edging techniques is essential. In this comprehensive guide, we’ll walk you through how to do landscape edging. Let’s get started.
What is Landscape Edging?
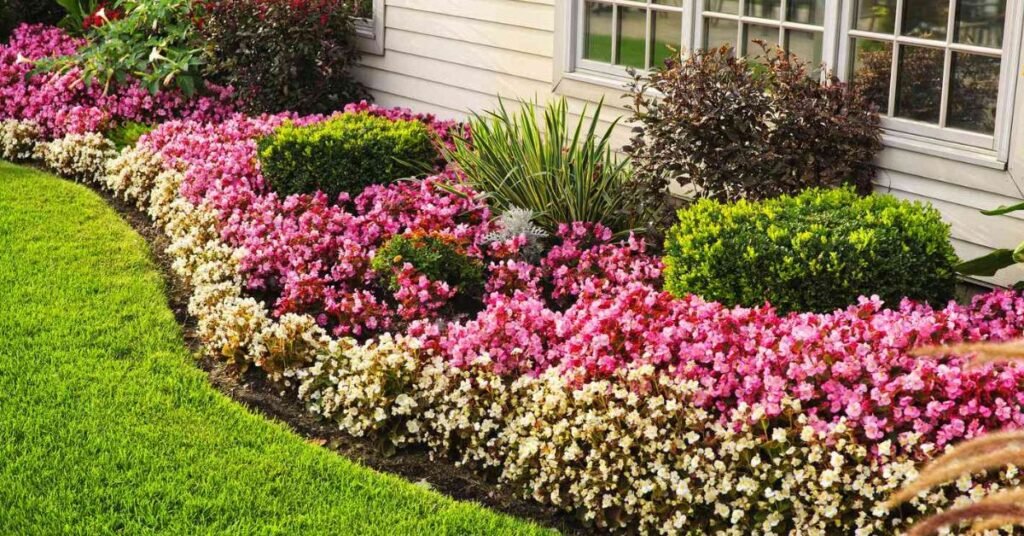
Landscape edging serves several purposes, including defining garden borders, preventing grass from spreading into flower beds, and adding aesthetic appeal to outdoor areas. By creating distinct boundaries, landscape edging helps maintain the shape and structure of garden beds while reducing maintenance efforts.
Types of Landscape Edging Materials
Before you start your landscape edging project, it’s important to choose the right materials. Here are some common options:
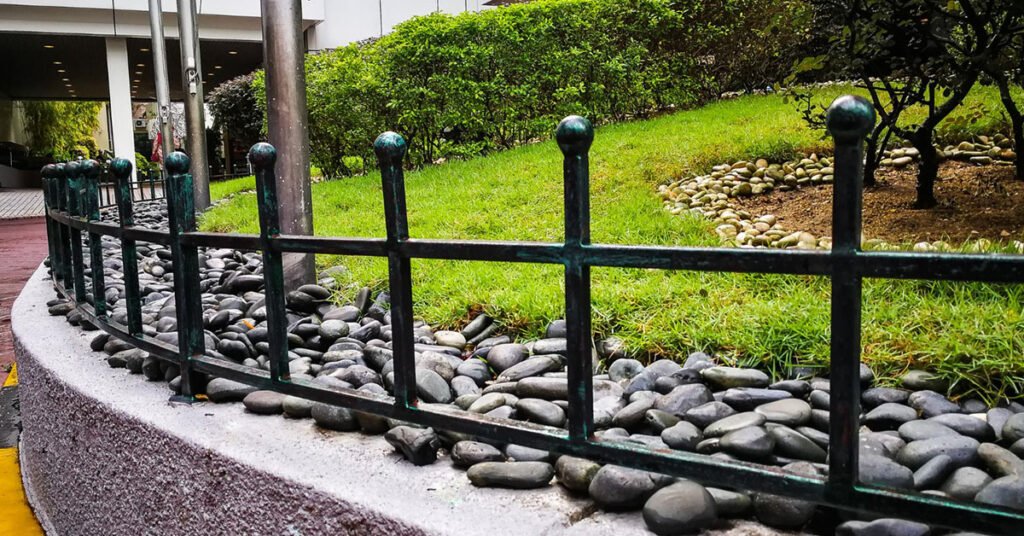
- Metal Edging: Durable and sleek, metal edging (such as steel or aluminum) offers a modern look and excellent longevity. It’s ideal for straight lines and curves but may require professional installation for precise results.
- Plastic Edging: Affordable and flexible, plastic edging (like polyethylene or PVC) is easy to install and comes in various colors and styles. It’s suitable for curved edges and lighter-duty applications.
- Natural Edging: Materials such as stone or brick provide a rustic and timeless appeal. Natural edging is sturdy and blends well with garden landscapes but may require more effort to install.
- Wood Edging: Wood options, such as pressure-treated lumber or railroad ties, offer a natural look and can be easily customized to fit curved or straight edges. Ensure the wood is treated to resist rot and pests in outdoor conditions.
Each material type has its pros and cons, depending on factors like durability, cost, and aesthetic preferences. Consider the specific needs of your landscaping project before making a decision.
How to Do Landscape Edging
Landscape edging plays a crucial role in defining and maintaining the shape of garden beds and outdoor spaces. Follow these steps to effectively edge your landscape:
Plan and Mark Your Edging Line
To begin landscape edging, start by planning and marking out your desired edge. Using a garden hose or marking paint, outline where you want the edge to be.
Take into account the natural curves of your garden beds and any straight lines you wish to create. This step serves as a blueprint for the rest of the edging process, ensuring your landscape edges are well-defined and visually appealing.
Prepare the Trench
Once you’ve marked your edging line, it’s time to prepare the trench. Using a sturdy spade or specialized edging tool, carefully dig along the marked line to create a trench. The depth of the trench should correspond to the height of your chosen edging material.
This step is crucial as it provides a stable foundation for the edging material and helps to contain soil and mulch within the designated garden area.
Install the Edging Material
With the trench prepared, proceed to install your chosen edging material. Place the material into the trench, ensuring it sits evenly along the marked line. Use a level to check for consistency in height and alignment throughout the entire length of the edging.
Depending on the material, you may need to secure it in place with stakes or anchoring spikes to prevent shifting over time. This step not only defines the border of your garden beds but also adds structural integrity to your landscaping design.
Secure and Backfill
Once the edging material is in place, securely anchor it to the ground to ensure long-term stability. For flexible materials like plastic or metal, insert stakes or spikes at regular intervals along the edging to hold it firmly in position.
Next, carefully backfill soil into the trench behind the edging material. Pack the soil firmly to provide additional support and prevent the edging from shifting. Proper anchoring and backfilling ensure that your landscape edging remains intact and functional, even in varying weather conditions.
Trim and Finish
To complete the landscape edging process, trim any excess edging material that extends beyond the desired line. Use garden shears or a utility knife to neatly cut away any protruding edges. Take time to tidy up the surrounding area by removing debris and smoothing out the soil around the newly edged beds.
Finally, water the soil gently to settle it around the edging material and encourage healthy root growth. This final step not only enhances the aesthetic appeal of your landscape but also promotes the longevity of your edging installation.
Read More: How Much Landscape Maintenance Cost?
The Takeaway
By following these steps, you can create clean and defined edges that enhance the appearance and functionality of your garden beds. Regular maintenance, such as checking for edging stability and adjusting as necessary, will help preserve the integrity of your landscape edging over time.